

Setting up the JMeter distributed test infrastructure for the performance testing is not very easy! We already have seen that Docker can help us here in setting up the infrastructure. If you have not read the articles of TestAutomationGuru, I would suggest you to check these.
When we do the actual performance testing, we might use our own servers or cloud like AWS-EC2. Even though Docker helped us in creating the containers with JMeter + Java etc, multi-host networking was not very easy!!
Lets see how it can be done using RancherOS + Rancher Server
Rancher/OS:
RancherOS is the smallest, easiest way to run containers at scale in production, and includes only the services needed to run Docker. By removing unneeded libraries, and running the latest version of Docker by default, RancherOS reduces the hassle with updating, patching, and maintaining your container host operating system. Containers on RancherOS boot in seconds, making it easy for teams to move and scale quickly.
RancherOS is a lightweight OS + Rancher is a docker-containers management platform which runs on RancherOS or any other OS where docker is installed.
Rancher Installation:
- As we are going to create all other containers in AWS-EC2, first lets create an instance in AWS with RancherOS.
- It does not have to be RancherOS. Any system with docker will do.
- You can create a Linux/Ubuntu instance as well in AWS-EC2 & install docker.
- It can also be done with your local machine – But ensure that the machine with docker is not behind any firewall.
- Once you have a system either local / cloud with docker / RancherOS installed, then we need the docker-container management platform which is Rancher server.
- To start a Rancher server, run this command.
sudo docker run -d –restart=unless-stopped -p 8080:8080 rancher/server
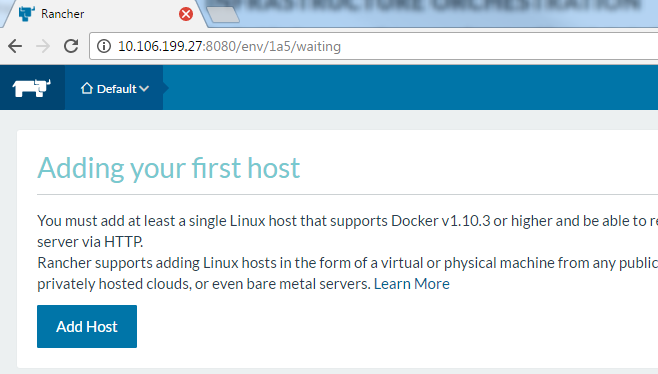
- Wait for 2 – 5 mintues & access : http://aws-or-local-ip-where-rancher-installed:8080
- You will see this screen!
AWS Inbound Rules:
As part of this post, I am going to use AWS-EC2. You can also use any VMs/cloud/Physical machines.
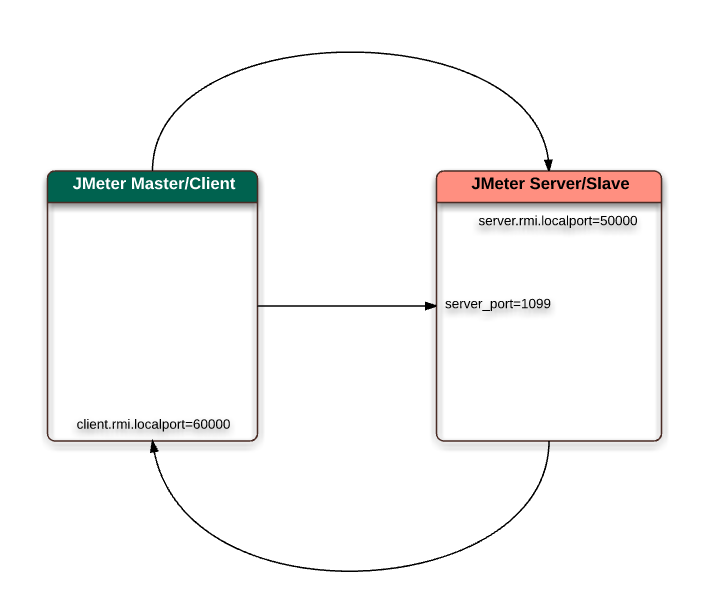
Rancher communicates with rancher agents using some ports. Please ensure that below ports are open.
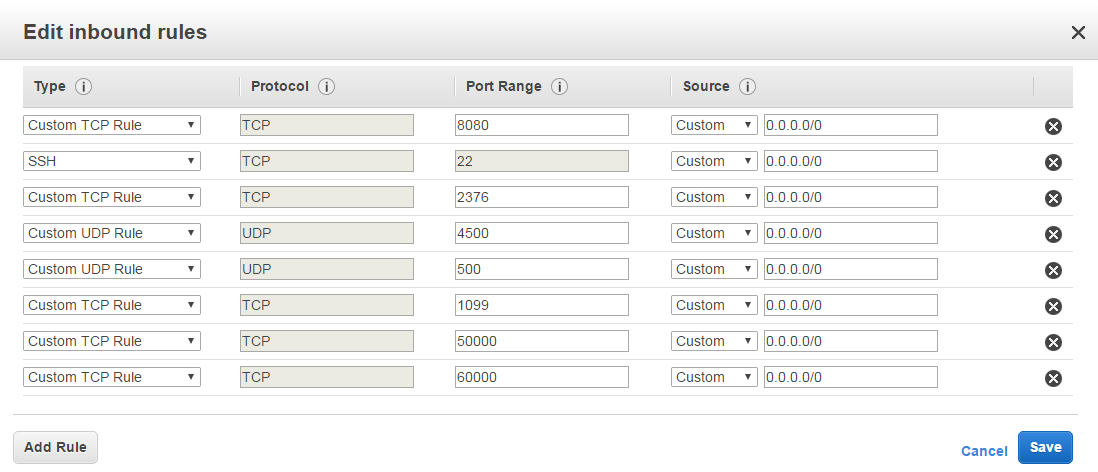
The last 3 ports (1099,50000 & 60000) have been added for JMeter master-slave communication.
Rancher – Creating Environment:
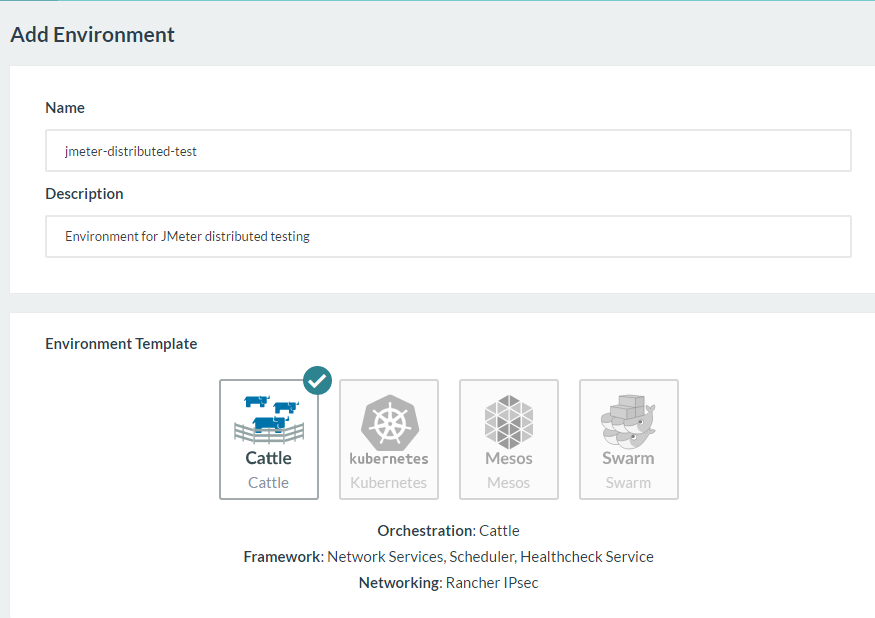
I am creating a separate environment in the Rancher UI – call it as jmeter-distributed-test environment. Rancher uses different templates for managing multi-container application. Cattle is Rancher’s own container orchestration template which is default.
Rancher – Creating Hosts:
Once an environment template is chosen, then the next step is to create hosts. I chose Amazon EC2.
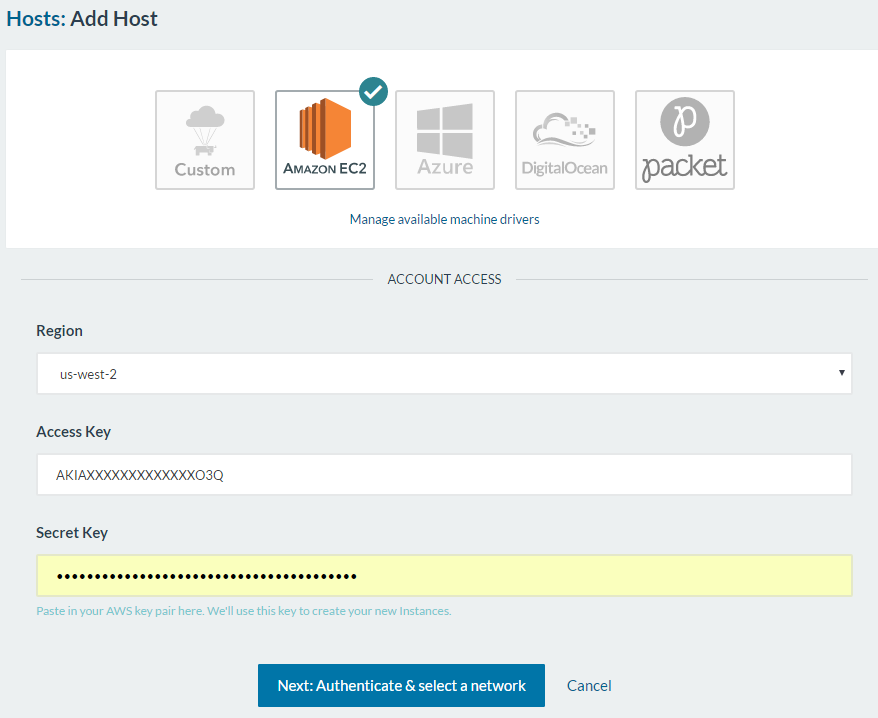
- Enter the Access & Secret keys
- Select the zone
- Choose the same subnet for all the machines
- Select the security Group (you created already in AWS – please check the Inbound rules above)
- Choose the Quantity (I chose 5)
- Choose the instance type & AMI (I chose Ubuntu micro instances)
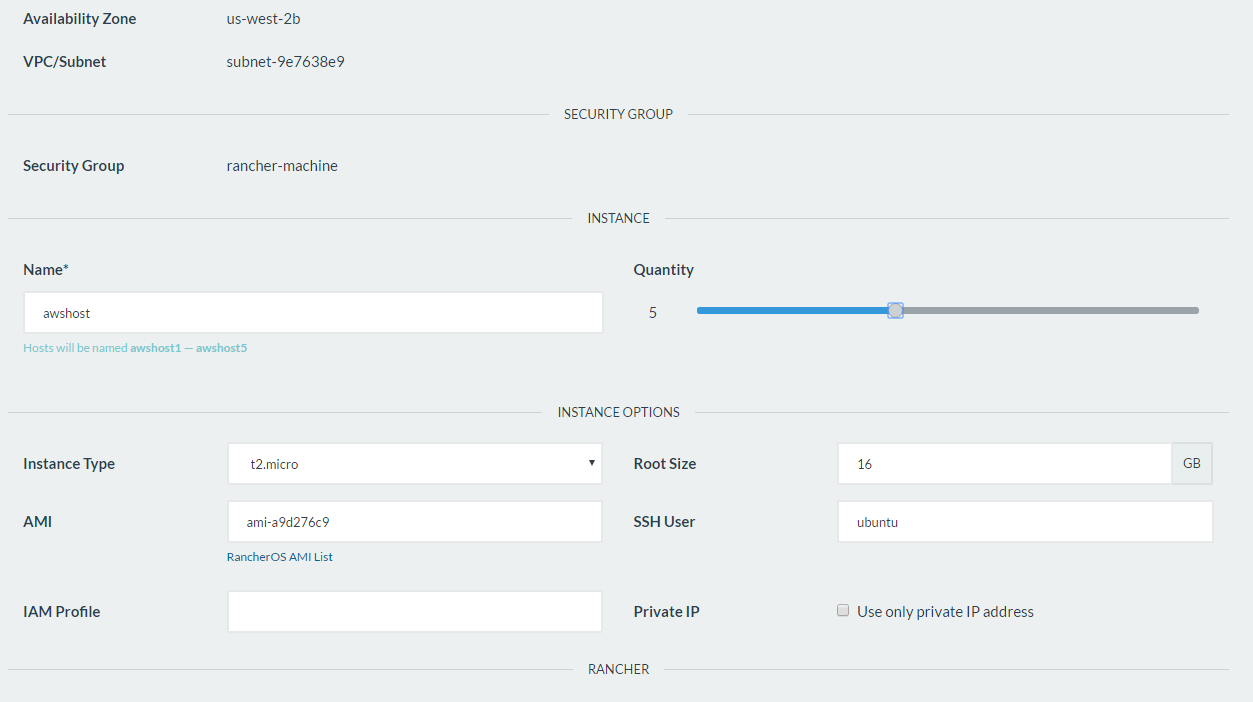
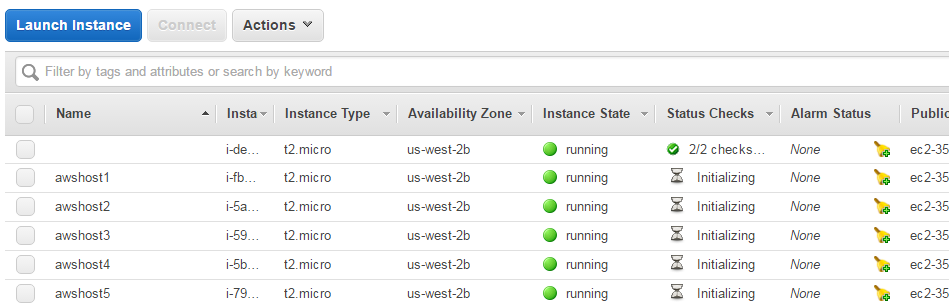
- Once you click on create, Rancher will create the instances in EC2 immediately for you & sets up docker in the all the instances.

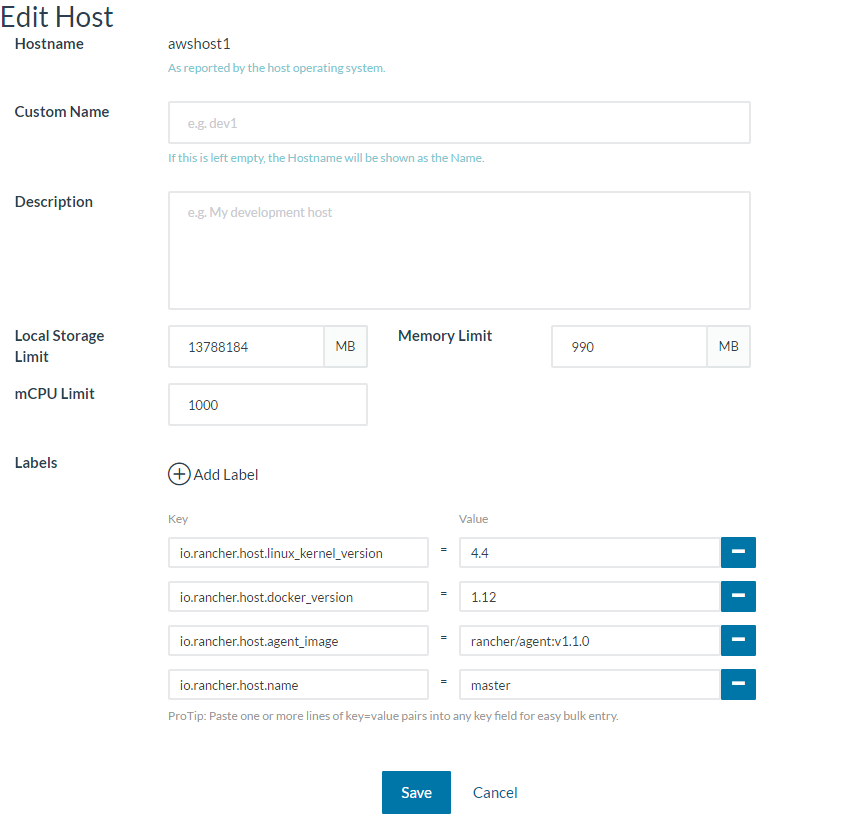
Once all the hosts are ready, edit 1 of the hosts which is going to be a JMeter-Master. Add a label “io.rancher.host.name=master“. You will know why in the next section.
Rancher – Creating Stack:
Stack is simply a set of services to run our application. To run our JMeter-distributed test, we need 2 services.
- master service (we need only one master)
- slave/server service (we need N number of slaves depends on the need)

- Create a Stack with an appropriate name
- Create a master service under the Stack as shown here. We need only one container. I would be reusing the docker-image which I had already created. vinsdocker/jmmaster
- It exposes port 60000 & it has to be mapped with host port 60000
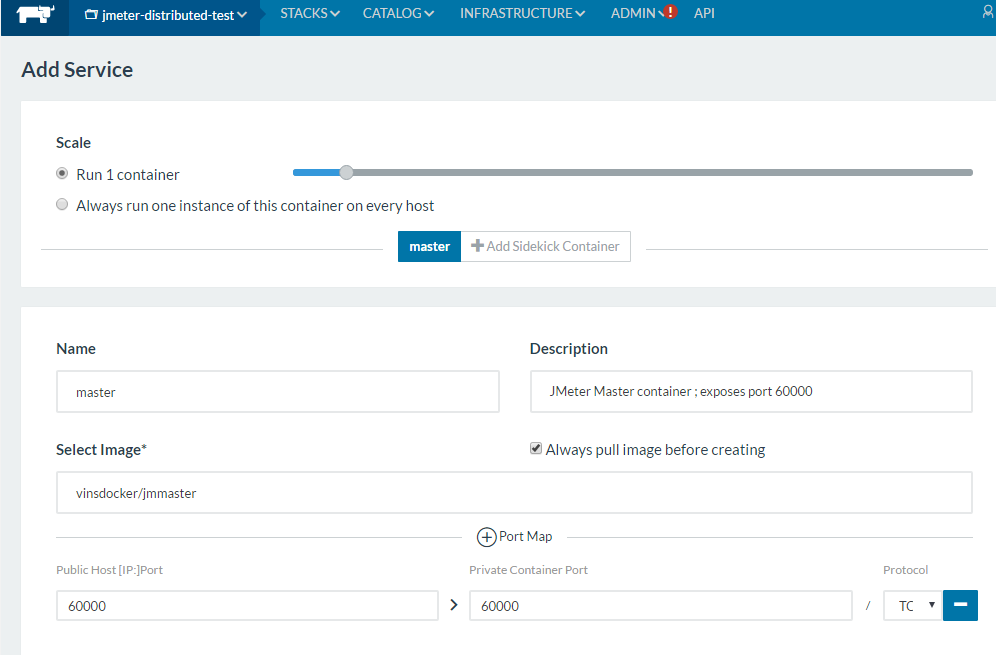
- If you click on the ‘Create’ button, Rancher will start this container in one of the hosts – It will be random. This is where the label we had created will be useful.
- Go to ‘Scheduling’ section of the service ; add a specific rule to choose the host which has the label you had set.
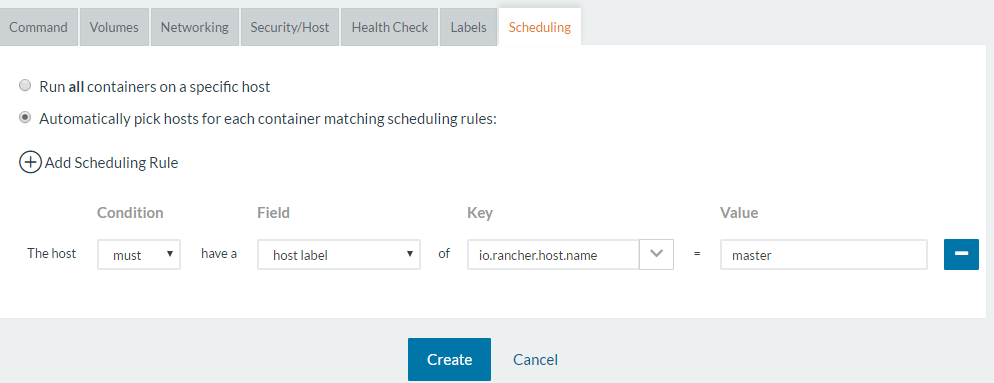
- While rancher is creating a jmeter-master container on the specific host, We can create slave/server services.
- We need jmeter-slaves in all the hosts except master.
- Uses the docker image: vinsdocker/jmserver
- Exposes port 1099 and 50000
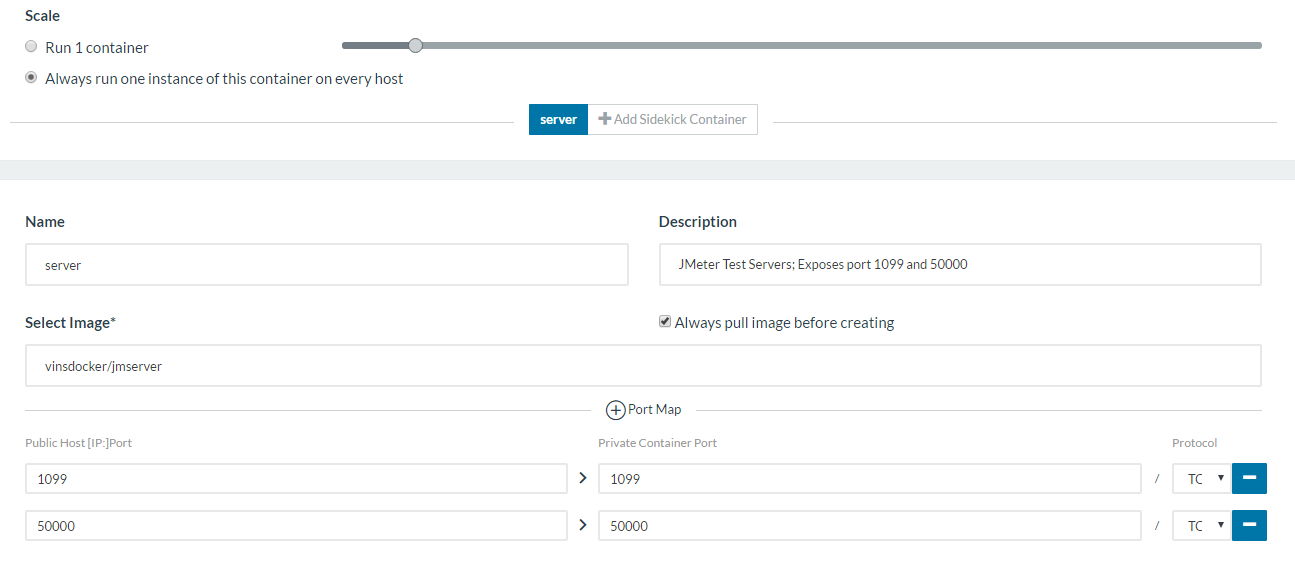
- Scheduling rule would be to run on all the hosts except master.
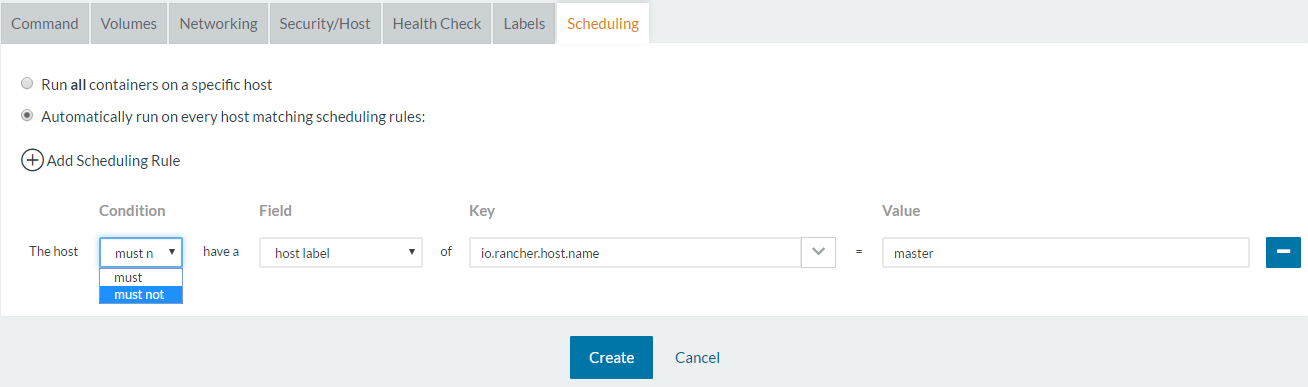
- Once created, We can see 1 master container and 4 slave containers.
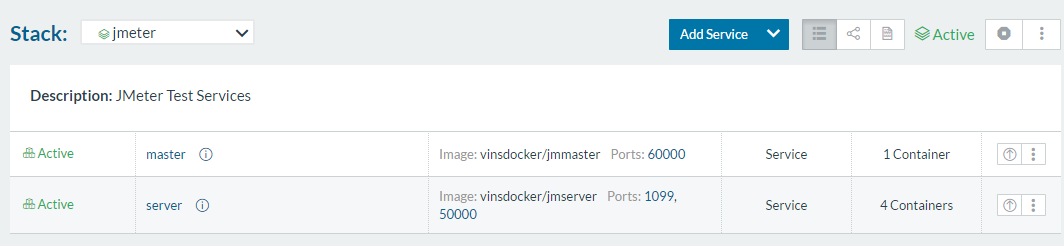
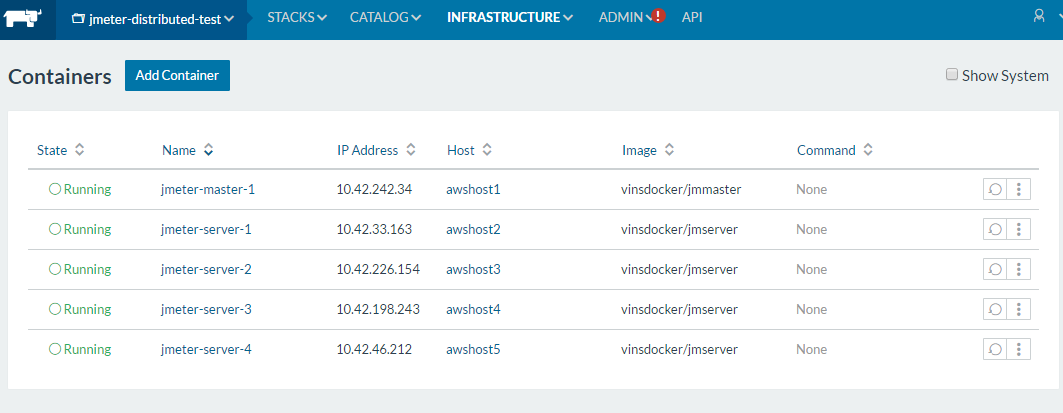
Rancher – Containers:
Access Rancher’s containers section to see the list of all the containers It had created so far and it details like names & ip address etc. As you see each and every container runs on a separate hosts which is the right set up for the actual performance test.
JMeter – Distributed Test:
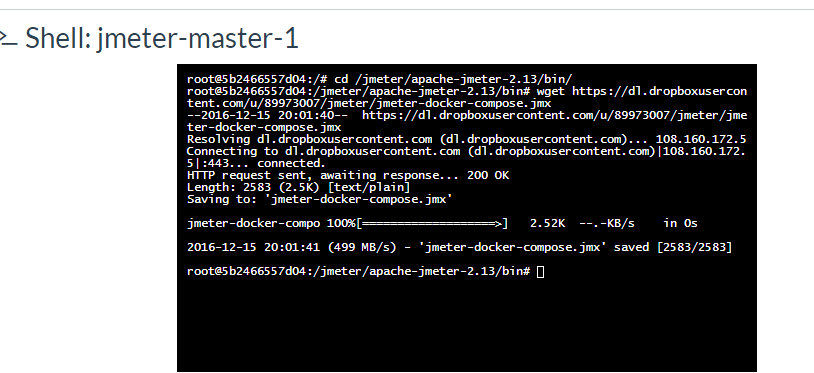
- You can click on the right most dots for the master container to see the options for ‘Execute Shell’ to run specific command on the master container directly.
- I execute the below command to go to JMeter’s bin directory & download a sample test.
cd /jmeter/apache-jmeter-2.13/bin

wget https://s3-us-west-2.amazonaws.com/dpd-q/jmeter/jmeter-docker-compose.jmx
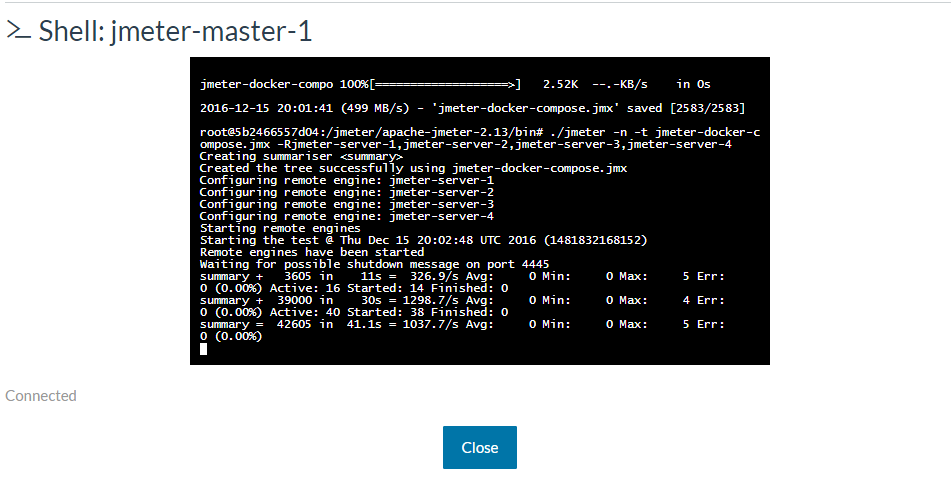
- Once the test is downloaded, the rest is simple!
- Run the below command to run the distributed test.
- slave machines names are jmeter-server-1, jmeter-server-2, jmeter-server-3, jmeter-server-4
./jmeter -n -t jmeter-docker-compose.jmx -Rjmeter-server-1,jmeter-server-2,jmeter-server-3,jmeter-server-4
Rancher – Export Service Configuration:
Creating a Stack with master and slave services might look like a little bit work for you for the first time! Actually It is simple. Rancher also provides an option to export this configuration – so that you can import next time / share with others.
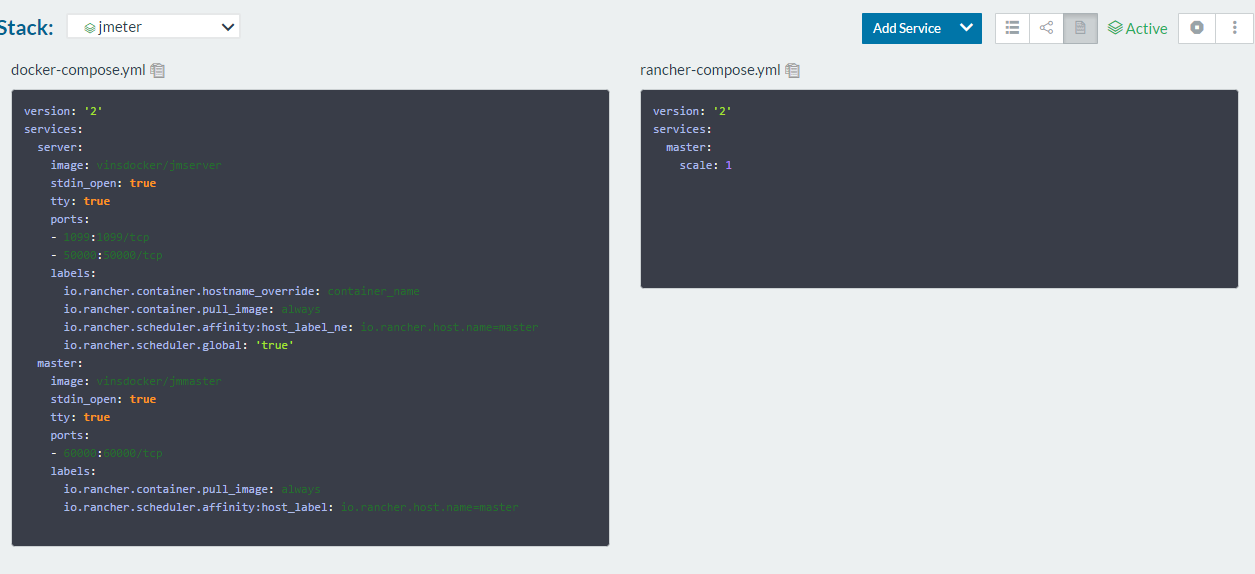
Next time you can either copy & paste the config / import the files. You can use below config which I had exported.
Summary:
Here before – Setting up this test environment was not very easy. We need to ensure that same version of JMeter + Java + jmeter-plugins + any other dependencies are present in all the machines. On top of that we also need to ensure that appropriate ports are open. Sometimes – you will still face an issue – due to Java RMI.
Rancher + Docker + EC2 make our life easier. As soon as you upload the config – everything is set up & all the containers are ready within a minute to run the test.
Rancher also exposes a set of API & comes with CLI to do everything programmatically!!
Happy Testing & Subscribe 🙂